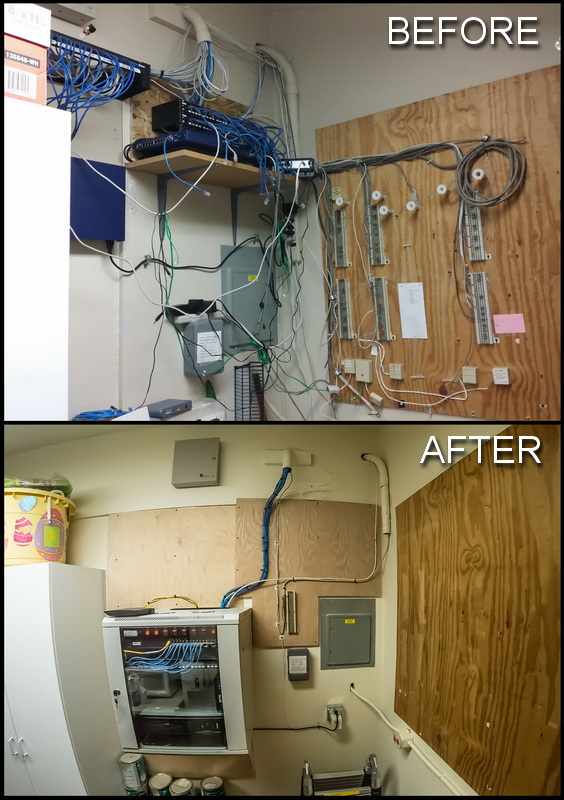
This is a small real estate office in a rural town here in Southern California that was cabled and networked by a real amateur (at best). This company had fleeced by about 3 different IT companies over the last 10 years and I’m now there to clean up the mess. Here is the smaller project I recently completed.

Above is the original condition of the network. This is the corner of the break room / kitchen in the office. There is legacy phone cabling on the wall (some of which is still in use), crap / trash on the floor, and a so-called business network running on unprotected outlet strips (not even surge protected). They run on the same circuit as the kitchen does so the blender, microwave, and refrigerator all affect the power to the network.
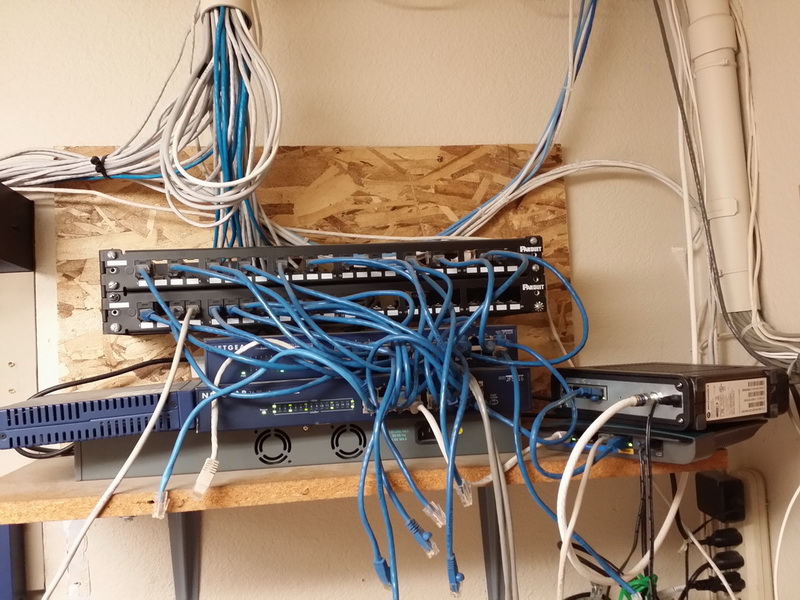
You have to step on a 5 gallon paint bucket or a small ladder to get to the shelf where pile ‘o switches reside. About half of them aren’t in use…

Next to that is a switch with POE running their VOIP phones. I already tested their network connection through the phone’s Ethernet out port and was able to surf just fine so there’s really no need for 2 separate network drops at each desk.
I did this in 2 phases as this office remodel so I first just needed to keep them running until I can pull all new cable to each office. First I installed a proper rackmount cabinet to safely and securely store all the equipment and patch panels (at a height that doesn’t require a paint bucket to reach). I installed a 1500VA UPS for power protection. Then relocated all the patch panels.
The 2nd phase was about 2 months later and entailed pulling all new cable so that there will be a clean and consistent run to this cabinet and not from about 3-4 holes in the wall at various locations.
** WORK BEGINS **
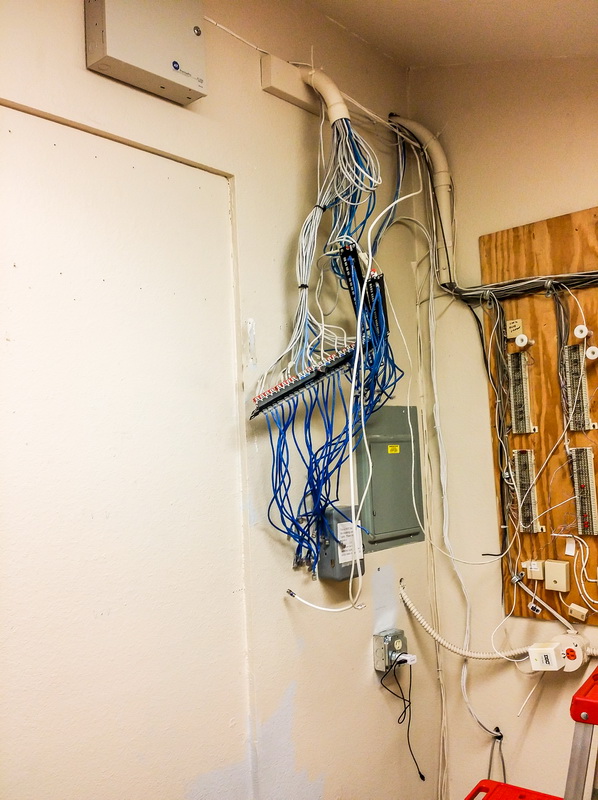
–I’ve removed all the backboard that was previously mounted. In most cases, I didn’t even need to unscrew anything because it was only screwed into the drywall and didn’t hit any studs! Also, they used a lot of particle board and not plywood…
Next, I had my electrician install a new, dedicated circuit for the networking equipment just below the breaker box. By surface mounting the receptacle, I can run future conduit if needed for expansion.
My first issue was the 1″ deep pocket in the wall that needed to be even with the wall around the breaker box.
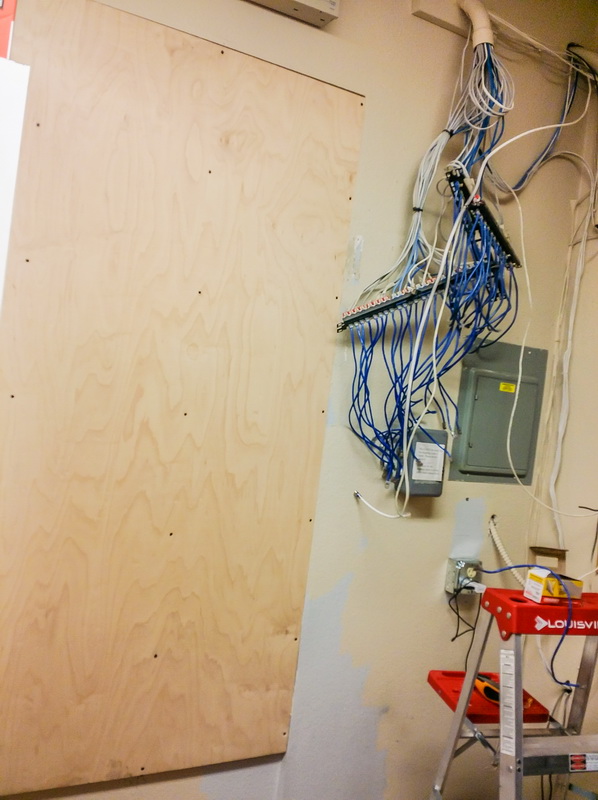
–Filled the gap with a sandwich of 1/4″ and 3/4″ plywood to make a total 1″ fill. Used deep screws to securely anchor this wood to the wall at each stud.
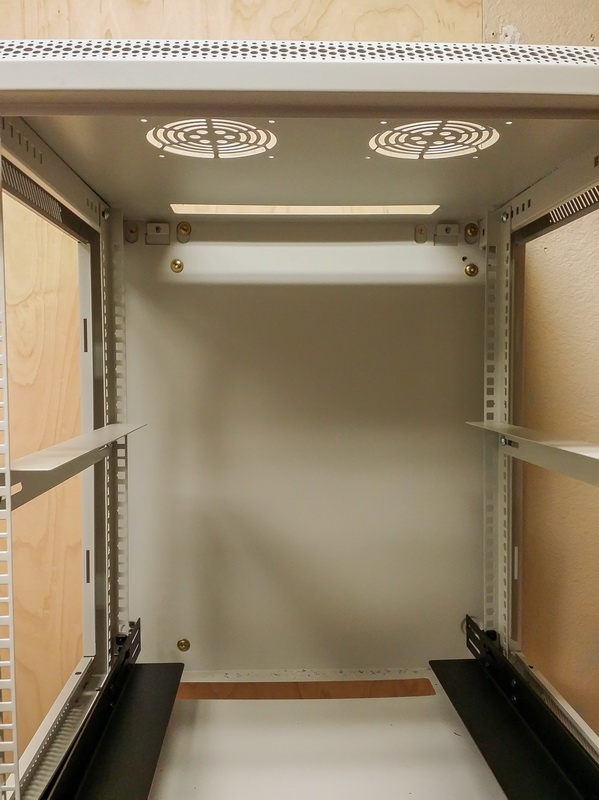
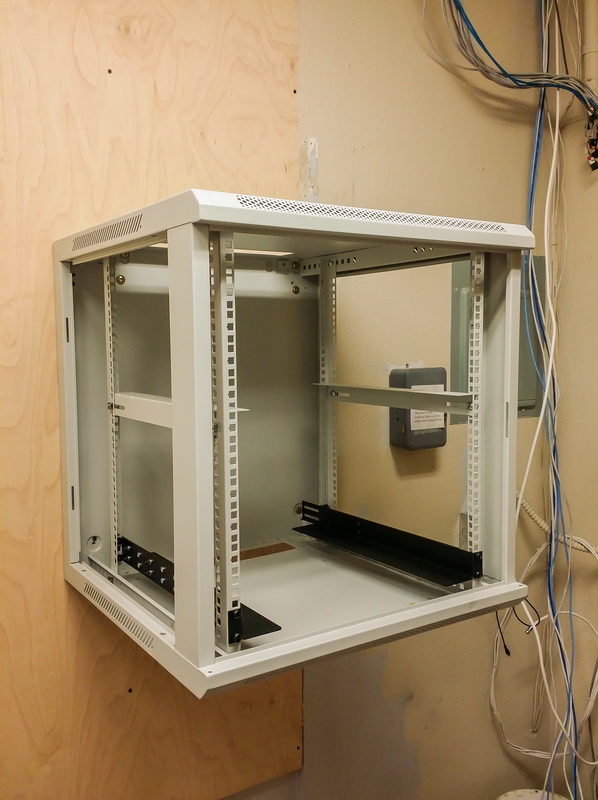
–Mounted a rackmount cabinet to the new plywood wall. I used lag bolts with very wide heads to spread the load and used 3 on each side in the corners of the cabinet.
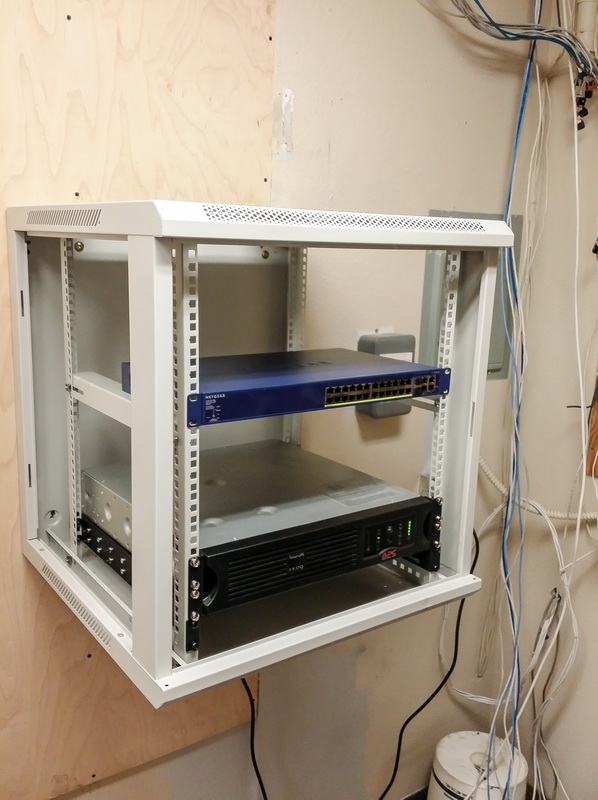
–Mounted a rail at the bottom and set a rather heavy 1500 VA APC UPS in place.
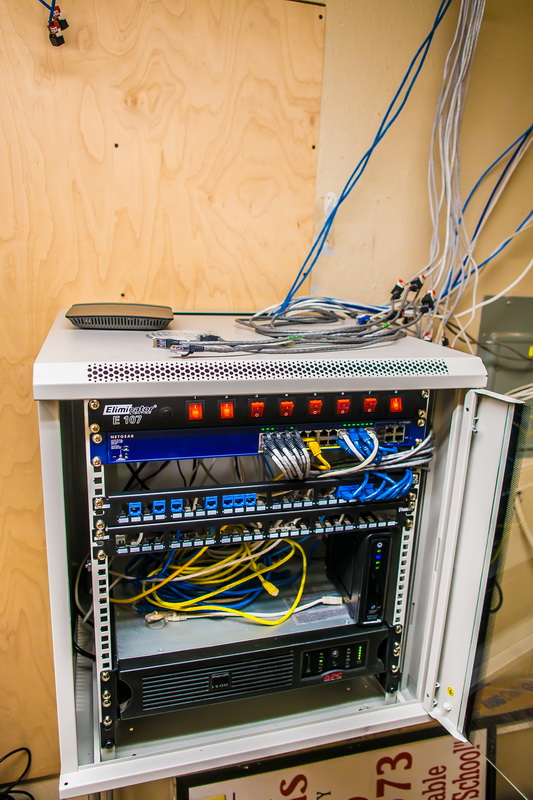
–Populated the cabinet with the current equipment needed to keep the office running until the remodel.
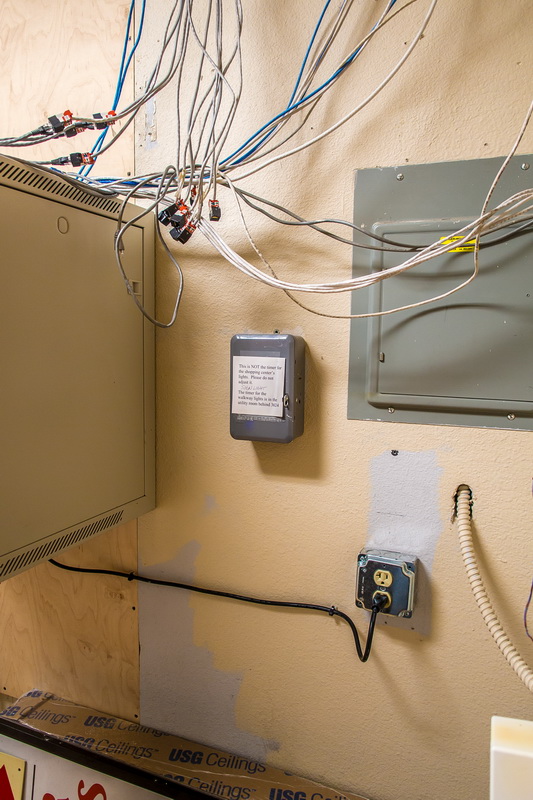
–Ran power to the cabinet in from the bottom opening and secured the cable to the wall.
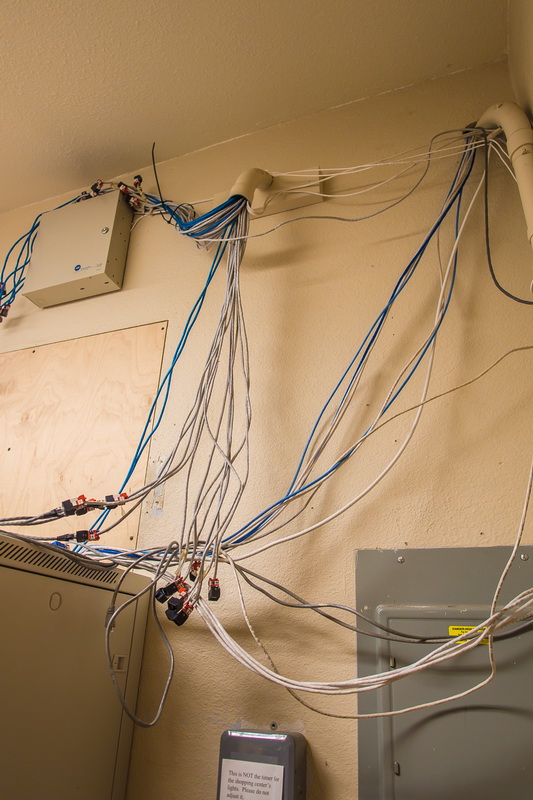
–I am running temporary jumpers that go out of the cabinet to reach the old cables for the moment. You can also see plenty of cables that aren’t being used now that their Internet connections for their PC’s are running through their VOIP phone jacks. Also, a majority of the office PC’s run wirelessly since they bring in their own laptops most of the time. You can also see the security alarm box that some moron decided to mount almost at the ceiling!

–So here’s the finished state in Phase 1. It was a 1-day (actually night) job I did over the weekend so there was no service interruption. Agents came in Monday morning and continued to work as normal. Still, even at this state, I feel much better about the network conditions. It is a much simpler configuration, easier to troubleshoot if the need arises, and there is a significant improvement in power protection.
** PHASE 2 COMPLETE **
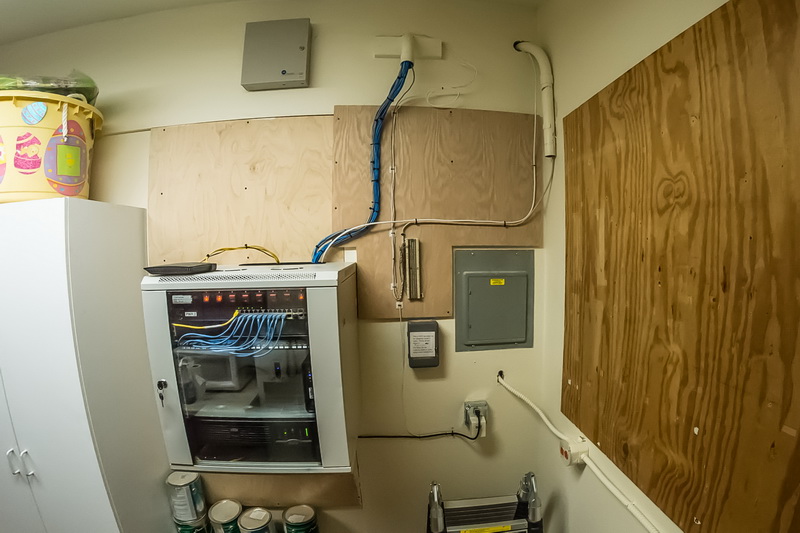
–Here is the completed setup. I’ve run all new cabling throughout the office, pulled all legacy abandoned phone cabling, and added a second backboard to the wall for future equipment.
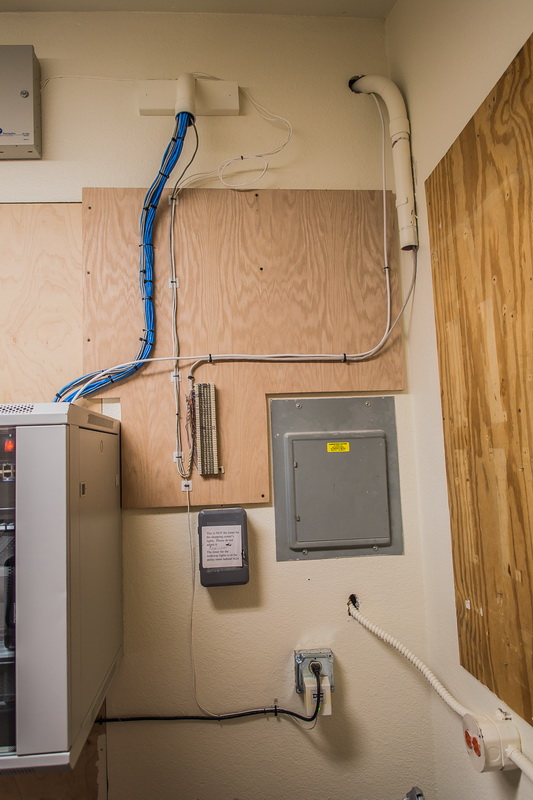
–With the additional backboard installed, I relocated the remaining 66-block that runs just a single analog FAX line (soon to be replaced with a virtual FAX line) and the alarm system. I also relocated the alarm system power to the new receptacle. I will probably be adding a second receptacle to this wall with an independent circuit just for the pending T1 and related equipment that will be installed. Until then, we’ll make due with what’s here. If the alarm company wants to relocate their box to a more reasonable level, they can now as well!
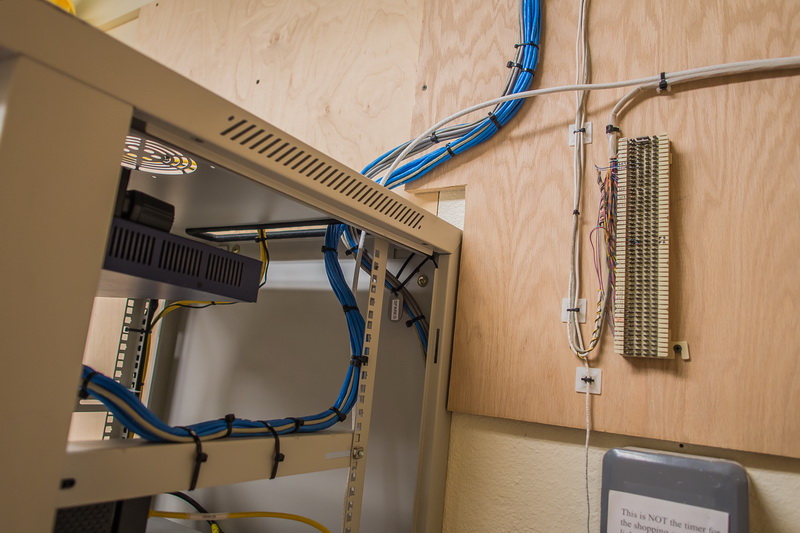
–I ran double the amount of CAT5e cable as was needed but had no need to terminate them all. So I split the spare cables to a separate bundle and labeled them as spares in the back of the cabinet. This turned out to be a good thing as the company decided they wanted to re-activate their analog FAX line (which I wasn’t expecting to do) so I was able to use one of my spare cables. Additionally, one of my lines must have been damaged during the remodel and I was forced to use the second cable run to one of the network drops (That’s why there is still one grey cable in the bundle running to the patch panel -I was hoping to keep them all blue).
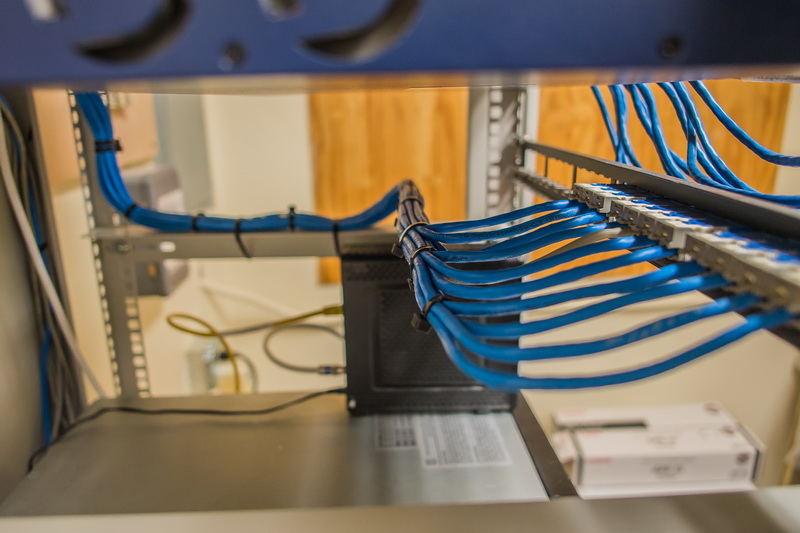
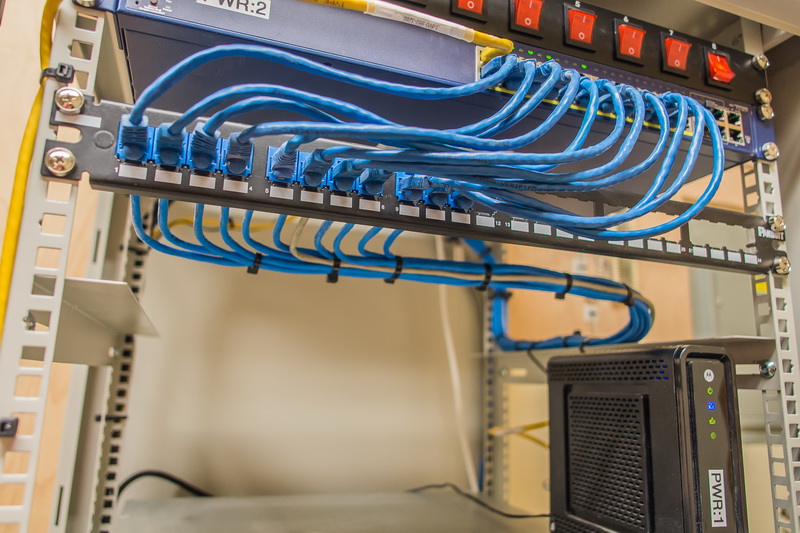
I wasn’t able to obtain a bar to run behind the patch panel so I had to rely on the strength of the cables to maintain the form after I had them terminated. I like to leave a good 3-4 inches of straight cable behind the patch panel in the event of troubleshooting or repairs in the future.
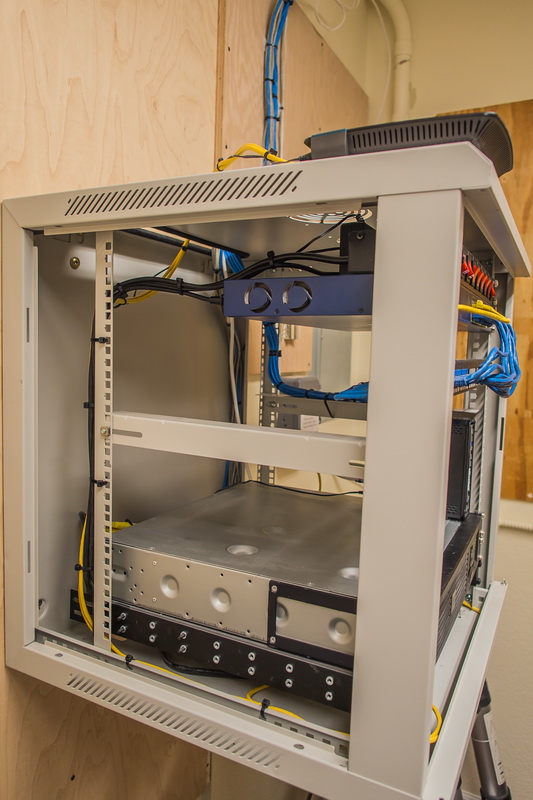
–Dressed all the power and data cables around the frame of the cabinet before closing the doors.
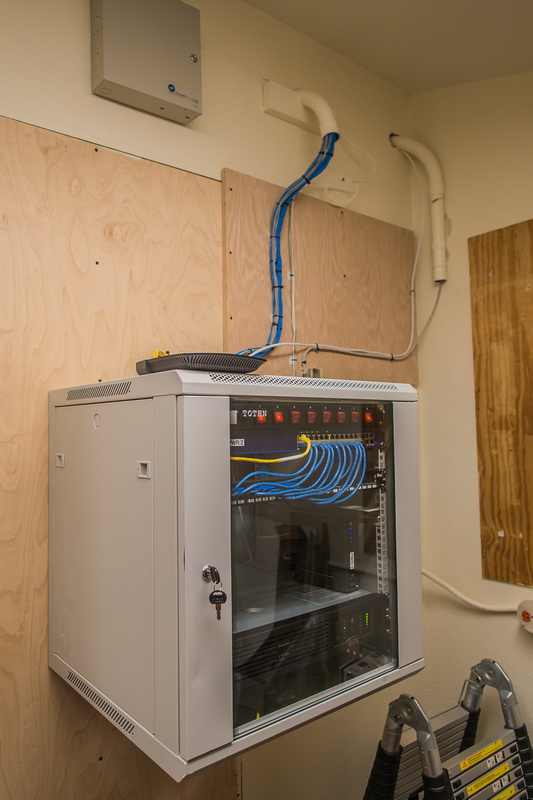
–All finished and closed up! After terminating all active cables, I dressed the cable bundles back up to the ceiling and into the space above the suspended ceiling, you can also contact professional from Suspended ceiling London to ensure the safety on your ceiling. This means I still have a good 6-10 feet of slack on each cable I’ve run (including my spares). If there is a future change that needs to relocate this panel, I have a large amount of slack to pull from overhead. I like adding the switch panel at the top of the rack to allow power cycling of equipment when troubleshooting. This means no one is reaching back behind equipment to pull power cables. I’ve clearly labeled on each piece of equipment what number they’ve been assigned on the panel as well as a master list on the switch panel itself. Not a bad addition for a relatively low cost!
Future plans involve adding a T1 and all new VOIP phones and a Cisco router / switch to manage the system. At that time, I will install a dedicated WAP to replace the consumer-grade wireless router sitting on the top of the cabinet!
I’m pleased with the result. This is now a secure and reliable network that will be easy to upgrade, troubleshoot, or modify.
